

Table of Contents
- How Custom 3D Printed Figurines Are Made
- Best 3D Printing Materials for Miniatures and Figurines
- How to Paint 3D Printed Figurines for a Lifelike Finish
- Post-Processing 3D Prints for a Professional Finish
- Pricing, Durability, and Legal Considerations for Collectors
- Start Your Custom Figurine Collection Today
- Frequently Asked Questions
Why Collectors Are Choosing Custom 3D Printed Figurines
Custom 3d printed figurines for collectors offer a middle path between mass-produced action figures and expensive one-off statues: a bespoke piece designed around your favorite game, character, or original idea, printed to order at an accessible price.
A figurine is no longer limited to what a factory decides to produce. You control the pose, the scale, the material, and the paint job, resulting in a piece with dimensional accuracy that factory lines cannot match.
The technical barrier has dropped: what once required engineering software and a $2,000 printer is now accessible through service providers who handle the entire pipeline. Below, we cover how these pieces are made, which materials last, and the finishing steps that separate a toy from a display centerpiece.
How Custom 3D Printed Figurines Are Made
Every custom figurine starts as a 3D model, either sculpted in software or captured from a real object using photogrammetry. That digital file, typically an STL file, is then fed through slicing software which translates the model into thousands of thin layers. The printer builds the piece one layer at a time from the bottom up, formally called additive manufacturing.
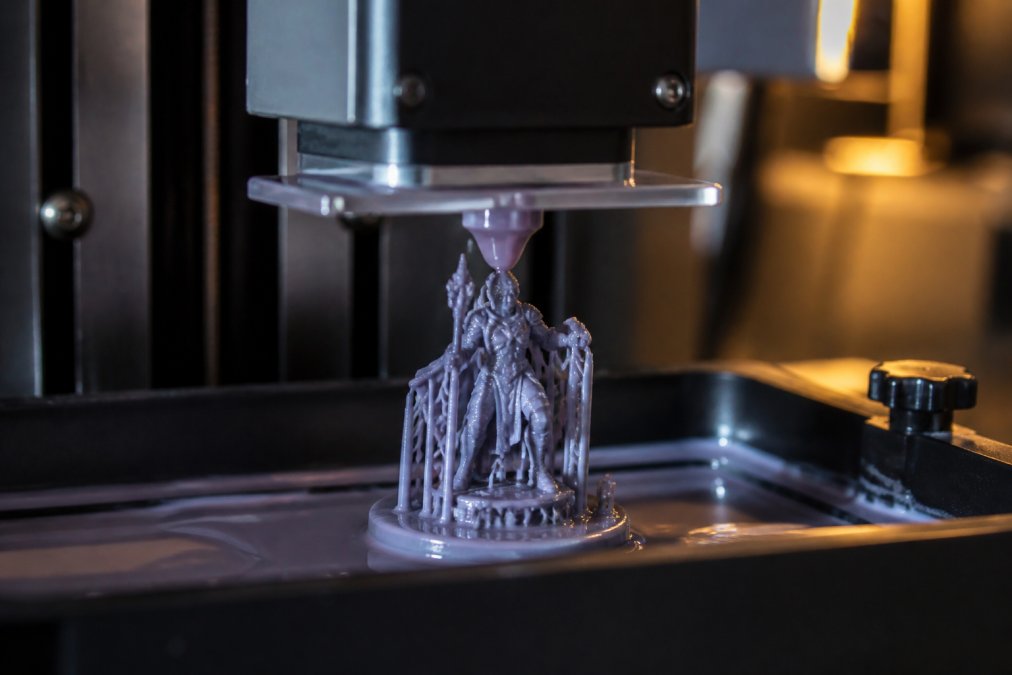
The quality of the finished piece depends almost entirely on the print resolution, measured by layer height. A standard filament printer might lay down layers of 0.2 millimeters, leaving visible ridges. For collectible-grade pieces, you want a layer height closer to 0.05 millimeters for a surface finish smooth enough for painting without obvious striations.
FDM vs. Resin Printing: What Matters for Your Collection
Two main technologies dominate the hobby: FDM (fused deposition modeling) which melts plastic filament, and resin printing which cures liquid resin with UV light. For figurines, resin printing wins nearly every time, producing crisper edges on miniature faces, weapon details, and intricate costume elements. FDM is better suited for larger props or functional items where layer lines are less noticeable.
Best 3D Printing Materials for Miniatures and Figurines
Material choice affects the long-term survival of your investment. Asking for a specific type can be the difference between a piece that looks great for a year and one that remains a centerpiece for decades.
Resin: The Collector's Standard
For detailed figurines, photopolymer resin is the undisputed champion. The key differentiator is the resin's chemistry, which affects both print fidelity and longevity.
- Standard Resin: This is the baseline. It captures the finest details, down to individual strands of hair or intricate filigree, but it is inherently brittle. A drop from a shelf can shatter it. More importantly for collectors, standard resin is susceptible to UV degradation. Over months of exposure to indirect sunlight, it can become increasingly brittle and develop a yellow or amber cast. If you choose this, plan on keeping it in a cabinet or away from any window.
- ABS-Like Resin: This is a blend that incorporates acrylonitrile butadiene styrene (ABS) to add a degree of flexibility. It is significantly more impact-resistant than standard resin. While it won't bend like a rubber toy, it will absorb a knock without shattering. This is the best choice for pieces that will be handled or displayed in high-traffic areas. Most professional services use a variant of this for its balance of detail and durability.
- Tough or Engineering Resins: These are formulated for functional parts, not just display. They are more expensive and often require different post-processing. For a collector, they are overkill unless you plan to use the figurine as a game piece that will see constant handling.
Filament: When Size Trumps Detail
Fused Deposition Modeling (FDM) uses thermoplastic filament. While its layer lines make it unsuitable for highly detailed faces or smooth surfaces, it has a place for larger, more structural pieces.
- PLA (Polylactic Acid): The most common and cheapest filament. It is rigid and prints easily, but it has a low glass transition temperature (around 60°C / 140°F). This means it will soften and warp in a hot car, near a radiator, or in a sunlit window. It is also biodegradable over a long enough timescale, which is not what you want for a permanent display piece.
- PETG (Polyethylene Terephthalate Glycol): This is a superior choice for larger, functional pieces. It is more durable than PLA, has a higher heat resistance, and is less prone to warping. It does not capture fine detail as well as resin, but for a 12-inch statue or a desk prop, it is a more stable material over the long term.
- ABS (Acrylonitrile Butadiene Styrene): While durable, ABS is prone to shrinking and warping during the print process itself, which can lead to dimensional inaccuracies. It also emits fumes during printing. For these reasons, it is rarely the best choice for a collectible where precision matters.
The UV Stability Factor
All resins degrade under UV light, but the rate varies wildly. A resin with UV inhibitors resists yellowing for years, while a cheap standard resin may change within months of indirect light exposure. Ask your provider if their resin contains UV inhibitors; if they don't know, that is a red flag. A UV-resistant clear coat applied after printing acts as a sacrificial layer.
A Practical Comparison for Display
| Material | Detail Capture | Impact Resistance | UV/Heat Stability | Best Use Case |
|---|---|---|---|---|
| Standard Resin | Excellent | Poor | Poor | High-detail display in a controlled, dark environment |
| ABS-Like Resin | Excellent | Good | Fair | Durable display pieces that may be handled |
| PLA Filament | Poor | Fair | Poor (low heat threshold) | Large, static props not exposed to heat |
| PETG Filament | Poor | Good | Good | Large, functional desk pieces |
Understanding these properties lets you make an informed decision rather than relying on a provider's default settings.
How to Paint 3D Printed Figurines for a Lifelike Finish
Raw 3D prints come out of the machine in a single color. The lifelike quality in finished collections comes from a multi-stage painting process. Start by washing the print to remove release agents, then apply a primer coat, which gives the paint something to bite into and reveals remaining layer lines.
Acrylic paints are the standard for miniature work because they thin with water and dry fast. The technique that transforms a flat figure into something lifelike is layering: a dark base coat, a mid-tone layer, and then a dry-brush highlight to catch the raised edges. For eyes and small details, a magnifying lamp and a size 0 brush are non-negotiable. Many first-time painters skip the gloss coat before applying a matte finish, which causes the final matte layer to cloud the underlying paint. A thin gloss seal first, then a matte top coat, locks in the colors without the shine.
Post-Processing 3D Prints for a Professional Finish
Post-processing transforms a print from a machine-made object into a hand-finished collectible. It is the most labor-intensive part of the process and where most of the quality difference between a $50 print and a $200 print lies.
Step 1: Support Removal and Initial Cleaning
Every resin print is printed with supports, thin struts of material that hold overhanging geometry in place. Removing them is the first test of patience. Use a pair of flush cutters to snip the supports away from the model, leaving a small nub. Do not try to pull supports off with your fingers; this will tear chunks out of the surface. For FDM prints, supports often peel away, but they leave a rough surface requiring more aggressive sanding.
After support removal, resin prints must be washed in 99% isopropyl alcohol (IPA) for 5-10 minutes to remove uncured resin. If you skip this step, the resin will remain tacky and never fully harden.
Step 2: UV Curing (Resin Only)
Washing alone does not finish the chemical reaction; the print must be cured under UV light to reach final hardness. A standard cure time is 5-10 minutes under a 405nm UV lamp. Cure until the surface no longer feels tacky and has a slight, uniform sheen. If using a service, ask if they cure in a nitrogen-filled chamber, which prevents the oxygen-inhibited tacky layer.
Step 3: Sanding to a Mirror Finish
The goal of sanding is to remove layer lines and support nubs. The process is always wet sanding, which keeps dust down and prevents resin particles from becoming airborne.
- Start with 220-grit: Focus on removing the support nubs and any visible print artifacts. Be careful not to sand away fine details like facial features or text.
- Move to 400-grit: This smooths out the scratches left by the 220-grit. You should start to see a uniform, matte surface.
- Progress to 800-grit: This begins to polish the surface, reducing the visibility of layer lines.
- Finish with 1000-grit or higher: For a truly glass-smooth surface, go up to 1500 or 2000-grit. At this point, the surface should feel smooth to the touch and have a subtle sheen.
Between each grit change, rinse the piece to remove loose particles. A common mistake is jumping from 220 to 1000 grit, which leaves deep scratches that the finer grit cannot remove. Always step up gradually.
Step 4: Priming and Surface Filling
After sanding, prime the piece with a high-quality filler primer, which fills micro-scratches and reveals remaining imperfections. Apply a thin, even coat from 8-10 inches away. Once dry, inspect under bright light, sand imperfections with 800-grit, and re-prime. This prime-sand-prime cycle is the secret to a flawless finish; repeat 2-3 times on high-detail pieces.
Step 5: Final Sealing
Once the primer is perfect, apply a clear gloss coat before painting. It provides a smooth, non-porous surface for acrylic paint and prevents patchy absorption into the primer. After painting, a final matte or satin clear coat protects the paint from scratches and UV damage.
Troubleshooting Common Issues
- Waxy Bloom: A white, waxy film that appears on resin prints after washing. This is caused by water in the IPA or incomplete washing. Fix it by washing the piece again in fresh, dry IPA and then curing.
- Sticky Surface: If the print remains tacky after curing, it is likely under-cured. Place it under the UV lamp for another 5 minutes.
- Visible Layer Lines After Priming: This indicates you did not sand enough before priming. Go back to 400-grit and sand more aggressively, then re-prime.
Mastering this workflow is what separates a hobbyist from a professional finisher. It is tedious, but the result is a figurine that looks like it was injection-molded and hand-painted in a factory, not printed in a garage.
Pricing, Durability, and Legal Considerations for Collectors
Pricing for custom 3d printed figurines varies by size, detail, and material. A small desktop piece under 4 inches might run $20 to $50, while a detailed 12-inch statue with hand-painting can exceed $200. The largest cost driver is print time, since a resin printer takes hours to produce even a small miniature at high resolution.
Durability depends on display location. Keep resin figurines out of direct sunlight and away from heat vents, and dust them with a soft brush rather than a damp cloth. For pieces that get handled, consider a protective display case.
Legal considerations also apply to the source file. The U.S. Copyright Office guidance on derivative works makes clear that altering an existing character design does not automatically create a new copyrightable work. Additionally, the Federal Trade Commission rules on product labeling require accurate country-of-origin labeling for goods sold commercially, which applies to 3D printed products. Collectors commissioning pieces should confirm the creator owns the rights to the digital file, a practice that the American Society of Collective Investments guidance on IP recommends for avoiding infringement disputes.
Start Your Custom Figurine Collection Today
The learning curve for a gallery-quality figurine is real, but the payoff is a collection that reflects your taste rather than a retailer's inventory. The technology now exists to make it happen without a factory minimum.
At CamGait3D Creations, we print every piece in-house with attention to material durability and surface finish. Our catalog includes everything from magnetic desk pets to themed skeleton sets. If you have a specific game or theme in mind, we can help you find a design that fits your display.

Browse the full collection of 3d printed figurines and decor at our shop, or reach out with your idea. The best time to start a collection was when you first saw a piece you loved. The second best time is now.
Frequently Asked Questions
How much does it cost to make custom 3D printed figurines?
The cost varies widely based on size, detail, and material. A simple, small desk figurine from CamGait3D Creations starts around $7.00, while larger, more intricate sets with multiple characters are priced near $30.00. Commissioning a truly bespoke piece from a designer will cost more due to the 3D modeling time involved. For collectors, buying from a specialized creator ensures the price reflects quality materials and careful post-processing.
What materials are best for high-detail collectible figurines?
For high-detail collectibles, resin is the best 3D printing material for miniatures because it captures fine features and produces a smooth surface finish. Standard PLA is more durable for larger pieces but shows layer lines. For display pieces where longevity matters, look for prints made with tough resins that resist yellowing and brittleness over time, ensuring your custom 3D printed figurines hold up for years.
Can I commission custom figurines based on original character designs?
Yes, you can commission original designs, but you must own the intellectual property rights to the character. Many creators love bringing personal OCs, pets, or family portraits to life as custom 3D printed figurines. However, they cannot legally print characters from copyrighted games, movies, or comics without a license. Always check the artist's policy on IP and ensure your design is original or properly licensed.
How do I ensure the durability of my 3D printed collection?
Durability starts with material choice and print settings. Look for figurines printed in high-quality resins or filaments that are cured and finished properly. Keep your custom 3D printed figurines out of direct sunlight to prevent UV damage and fading. When cleaning, use a soft brush or microfiber cloth to avoid scratching the paint. These simple habits will keep your collection looking pristine.
Custom 3D printing has removed the limits on what collectors can own, offering durability and detail that mass production cannot replicate. The key is choosing the right material, confirming the finishing process, and working with a creator who controls quality from file to final paint. CamGait3D Creations prints each figurine with quality control at every stage, from material selection to the final clear coat. Shop all of our designs and find the piece that belongs on your shelf.